You Asked It!

Tag: Dehydration

Drying Foods at Home

Freeze Dried Raspberries
Freeze dried raspberries
Photo: Canva.com

Drying, or dehydrating, foods at home can help extend the shelf-life of seasonal produce, preserve more nutrients in foods, and help provide shelf-stable foods that are easy to store. Interest in drying foods has increased with more affordable equipment options.

One method that has gained momentum is freeze drying foods at home. This method uses a specialized piece of equipement that uses a combination of vacuum pressure and heat to dry food. The first stage freezes food to -40°F which converts moisture to ice crystals. Then, under vacuum, the trays of food are heated to convert ice crystals to a steam vapor. This vapor is removed and 90 to 95% of the moisture leaves the food. This process can take hours to days depending on the food.

The cost of home freeze dryers can range from $2,400 and up depending on vendor, model, accessories, etc.

While freeze drying produces very dry food product, it does not kill bacteria. So, it is important to handle food safely to prevent contamination or cross-contamination. It is also important to read the instruction manual for the equipment to learn about specific guidelines and safe operating procedures.

Source: Let’s Preserve: Drying Foods at Home, NebGuide G2363 and Freeze-drying Food, University of Minnesota Extension

Making Fruit Leather

Fruit leather
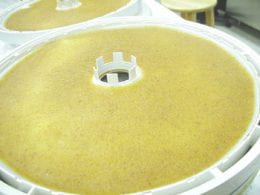
Pureed fruit on a dehydrator tray.
Photo: University of Georgia

Making homemade fruit leather is a great way to use up extra fruit and have a healthful snack. But fresh fruit can harbor bacteria that can cause foodborne illness. It is best to heat the fruit for safety and better retain color.

North Dakota State University Extension recommends heating fresh fruit in a double boiler to steam heat the fruit. It takes about 15-20 minutes and the temperature should reach 160°F with a food thermometer. An alternative is to use canned fruit that is pureed, applesauce, or strained baby fruit.

Fruits choices for fruit leather include apples, apricots, berries, cherries, nectarines, peaches, pears, pineapple, plums and strawberries.

Learn more at www.ndsu.edu/agriculture/extension/publications/food-preservation-making-fruit-leathers.


Tips to Dehydrate Stone Fruit

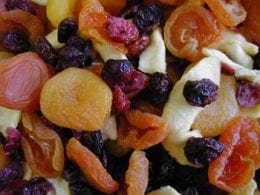
Dried fruitDehydrated fruit is an easy way to have ready-made snacks or to add a pop of fruit to cereal, yogurt, or homemade cookies. Dehydrating is the oldest food preservation method to remove moisture from food which prevents bacterial growth.
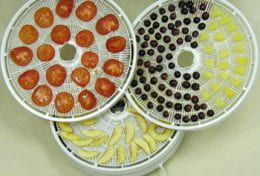
When drying stone fruits, such as apricots, plums, or halves of peaches and nectarines, first rinse them in running water. Remove the pits. The skin can be left on or removed. Pretreat as directed to reduce discoloration. Press the rounded side, or outside, inward to invert the fruit half. This helps expose the inside flesh and the fruit will dry faster. If the skin is still on, place the fruit skin side down on the dehydrator tray.  Optimum dehydrating temperature is 140°F while air circulates to pull moisture out of the fruit. Dry until pliable and leathery.

Learn more at www.rrc.k-state.edu/preservation/drying.html

Photo: Univ. of Georgia

Make Fruit Leather for a Sweet Treat!

Fruit leather
Use lined food dehydrator trays to easily dry fruit leather. Photo: NCHFP

Looking to add more fruit into your diet? Use fresh berries to make fruit leather for a handy snack. Berries are in season, so now is a great time to make fruit leather.

When fruits are dried, moisture is removed which concentrates the flavor and caloric value. The same is true when the fruit is in the form of a leather. Fruit leather tastes sweet without additional sugar and are a good source of energy. Use as snacks (children of all ages love them) or include with hiking or camping supplies.

For instructions, go to the National Center for Home Food Preservation.

Source: Penn State University Food Preservation


Conditioning Dehydrated Fruit

Dehydrated Fruit
Photo: University of Georgia

Dehydrating fruit is a great way to make tasty snacks or to add fruit to a quick breakfast. When dehydrated fruit, how do you know when the fruit is dry?

Different fruits take different amounts of time to dry. The fruit pieces should be pliable but not tacky when touched. This is a visual clue that there is <20% moisture content remaining in the fruit. Cut open a piece and squeeze it, there should not be any remaining moisture. Let the fruit cool completely and package in an airtight container.

Allow the fruit condition about 7-10 days. This helps distribute the 20% moisture evenly. Shake the package each day and look for any visible moisture.

Learn more from Penn State Extension Food Preservation.


What is Freeze Drying?

Freeze Dried Raspberries
Freeze dried raspberries
Photo: Canva.com

Freeze drying food is another form of preserving food. Food can last longer and is very lightweight. Freeze-dried food also retains the color and shape of the food better. It is possible to freeze dry complete meals. But, the machine required to do this is expensive, takes up a lot of space, is heavy, noisy and uses more electricity. This machine works best in a room temperature range between 45-75°F and takes about 24-48 hours drying time.

Fruits and vegetables still need to be pretreated as in traditional dehydration. Fruit color should be protected using ascorbic acid or ascorbic acid mixtures. Vegetables should be blanched. These steps help control enzyme activity that can change color, texture, flavor and some nutrients.

It is important to note that raw and cooked meat and eggs can be freeze dried. This process does not kill harmful microorganisms that can cause foodborne illness. Care must be taken in handling and labeling these foods.

Learn more from Let’s Preserve: Freeze Drying from Penn State Extension Food Preservation.

Shopping Tips for Food Dehydrators

A food dehydrator is a small electrical appliance for drying foods indoors. It has an electric element for heat and a fan and vents for air circulation. Dehydrators are efficiently dry foods fast at 140ºF.

Costs vary depending on features. Some models are expandable and additional trays can be purchased later. Twelve square feet of drying space dries about a half-bushel of produce. The major disadvantage of  is its limited capacity.

Features to Look For

  • Double wall construction of metal or high grade plastic. Wood is not recommended, because it is a fire hazard and is difficult to clean.
  • Enclosed heating elements.
  • Counter top design.
  • An enclosed thermostat from 85ºF to 160ºF.
  • Fan or blower.
  • Four to 10 open mesh trays made of sturdy, lightweight plastic for easy washing.
  • UL seal of approval.
  • A one-year guarantee.
  • Convenient service.
  • A dial for regulating temperature.
  • A timer. Often the completed drying time may occur during the night and a timer could turn the dehydrator off and prevent scorching.

www.rrc.k-state.edu/preservation/drying.html


How to make Cherry Raisins

Photo: Utah State University

Wash and pit pie cherries. Heat 2 cups of cherries and 1/2 cup of sugar until the liquid boils for 1 minute. (Cherry-sugar mixture will form own juice.) With a slotted spoon, transfer cherries to a dehydrator. Dry at 140-150°F until moisture decreases to 80% solids. Cherries will be firm and rubbery to the touch. For best results, base the drying on the final solids content of 80%. Freeze or vacuum package to avoid mold growth.

To calculate desired final cherry weight for 80% solids:

  1. Weigh a container for fresh and dried cherries on a scale. Note weight.
  2. Add fresh cherries to the container. Weigh. Subtract container weight.
  3. Calculate desired final weight. (Fresh cherry weight) times (.175) = desired weight of dried cherries.
  4. Add calculated desired final weight (#3 above) and weight of container (#1). When dried cherries reach this point, they are ready.

Source: Utah State University Extension https://bit.ly/2K746C3


Drying Meat Safely

As fall hunting season approaches, there are many ways to preserve the meat. One of those is dehydrating meat jerky.

Optimum drying temperature is 140°F. But, meat must be heated to 160°F to eliminate possible E. coli bacteria. Pick one of these methods for safe jerky.

  • Prior to drying, heat the strips of meat in the marinade by boiling them for 5 minutes, drain, and pat dry. Proceed with dehydrating the meat.
  • After dehydrating the meat, place the jerky on a baking sheet and put into a 275°F oven for 10 minutes.

Learn more at www.bookstore.ksre.ksu.edu/pubs/MF3173.pdf


Commercial Jerky Recall

Jerky
Learn more about jerky at http://nchfp.uga.edu/how/dry/jerky.html

A Clarkson, WA establishment has recalled beef jerky products due to under processing and potential survival of pathogens in the meat. This recall is a reminder to those who dehydrate jerky at home to heat the meat to 160°F to eliminate potential E. coli bacteria. There are two methods to heat the meat. Choose one of the following:

  1. Boil the meat strips in the marinade prior to dehydrating for five minutes.
  2. After dehydrating, place the jerky on a cookie sheet and place in a preheated oven at 275°F for 10 minutes.

Jerky recall details can be found at: http://1.usa.gov/1OiSoEZ

For more information see: www.bookstore.ksre.ksu.edu/pubs/MF3173.pdf