You Asked It!

Tag: Food Preparation

Baking with Sprouted Wheat Flour

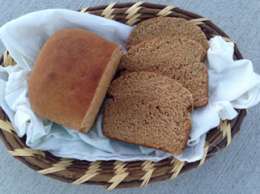
Sprouted Wheat Bread, Whole Grains Council

If you like to expand your baking by using new ingredients, have you tried sprouted wheat flour? Here are some tips from Pastry Chef Stephanie Petersen, from Panhandle Milling Company, to improve your baking success.

  • Add more gluten or knead the dough more. Sprouted wheat flour has a little less available gluten, so it may take more kneading to develop a good dough. Another option is to add 1-2 teaspoons vital wheat gluten per cup of flour.
  • Shorter fermentation time will give depth of flavor. For traditional long fermented dough, time is needed to develop flavor. Sprouted flour will reduce this time to achieve good volume.
  • Measure sprouted flour cup for cup.
  • Store sprouted flour in a cool, dry, dark, airtight container and use within 12 months. Freeze it to add another six months of storage.


Give Dough a Break with Autolyse

What is Autolyse (AUTO-lees)? When making homemade bread, a simple pause in preparing the dough can transform the final product. Autolyse is simply mixing some of the flour, liquid, and usually the yeast. Mix until combined, then let the wet sticky dough rest at least 20-60 minutes.

This rest, or autolyze, allows the weak, disorganized gluten matrix to break down and straighten. Once the remaining ingredients are added  and kneading resumes, the gluten matrix will organize and strengthen in a shorter amount of time. This can be very beneficial when mixing dough in a mixer as the strong mechanical action can quickly overmix the dough. This technique is also beneficial for rustic breads that have more water and allows the dough to rise vertically, rather than spread horizontally.

Source: https://blog.kingarthurflour.com/2017/09/29/using-the-autolyse-method/ and The Science of Good Cooking, Cook’s Illustrated


The Quest for Perfect Mashed Potatoes

The classic holiday meal side dish is mashed potatoes. But, what can make or break this dish is the type of potato used.

There are more than 200 species of potatoes, but they all contain two primary components, starch and moisture. Low starch potatoes give a firm, waxy texture and maintain shape after boiling. High starch potatoes give a crumbly, mealy texture, and become soft after boiling.

Low starch potatoes include small round red or white potatoes with a thin skin, such as Red Bliss potatoes. They are good for boiling, stewing, or chunkier mashed potatoes. Low starch potatoes absorb less liquid, thus yielding a firmer texture.

High starch potatoes include oblong Russets with thick skins. They are easy to mash and make great baked potatoes. High starch potatoes absorb more liquid, which easily breaks for a fluffy texture.

Yukon Gold potatoes fall in between these two and can be used either way.

Source: The Science of Good Cooking, Cook’s Illustrated


The Future of Coffee Creamers

Move over single-serve plastic coffee creamers! Introducing the dissolvable milk pod!

A German researcher has developed a pod with a single serving of milk, encapsulated in a sugar crust. The coffee will dissolve the sugar, and the sugar and milk are released into the coffee.

The current plastic containers of coffee creamers are not usually recyclable. So these new dissolvable pods could reduce waste.

The new milk pods are not currently on the market.

Source: http://bit.ly/2woc0Q1


Baking Perfect Sweet Potatoes

Have you ever baked a sweet potato and it remains hard? Time and temperature are important. So try this method.

Wash and scrub the potato. Poke it with a fork or knife several times. Jump-start the baking in the microwave until the internal temperature reaches 200°F, about 6 to 9 minutes, flipping every 3 minutes. Then, place on a wire rack set in a rimmed baking sheet to allow air circulation. Bake at 425°F for one hour to finish cooking.

The finished potato should be creamy and flavorful. Enjoy!

Source: Cook’s Illustrated, September 2017

For more recipe ideas, see: www.ncsweetpotatoes.com/sweet-potato-recipes/