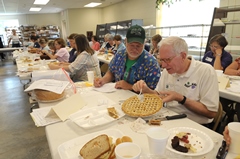
You Asked It!

Tag: Food Preservation

Jam and Jelly Problems and Solutions

peach jam
Source: NCHFP
Photo: KSRE RRC

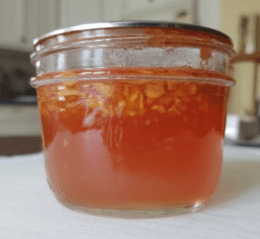
Sometimes jam and jelly recipes just don’t turn out right. So here are some problems, causes, and prevention strategies.

Learn more about other problems and solutions for jam and jelly at https://nchfp.uga.edu/how/can_07/jellyproblems.html


PROBLEM CAUSE PREVENTION
Too soft Overcooking fruit to extract juice Avoid overcooking as this lowers jellying capacity of pectin
Used too much water to extract juice Use recommended amount
Incorrect amounts of sugar and juice Measure correctly
Undercooking jam or jelly mixture Follow cooking times exactly
Insufficient acid Lemon juice may need to be added
Making too large of a batch Make only one recipe at a time
Moving finished jars too soon Allow finished jars to sit at least 12 hours
Insufficient time before using Some fruits take up to 2 weeks to set completely

A Caution About Preserving White Peaches

It’s almost peach season and many will be preserving this summer favorite in various tasty treats.

White fleshed peaches, however, cannot be canned like yellow peaches. White peaches are low acid so traditional canning cannot be done, and that includes water bath canning and pressure canning. No research has been done for safe canning. This includes plain peaches, jam, jelly, or any other mixture.

The best option is to freeze white peaches or eat them fresh.

To preserve yellow peaches, see our Preserve it Fresh, Preserve it Safe: Peaches publication.

Source: University of Georgia


Preserving Melons

cantaloupe
Fresh cantaloupe
Photo: USDA ARS

Melons are another summer treat! They are best eaten fresh, but there freezing them for later use is an option.

Rinse with water and scrub the rind to remove dirt, then dry. Slice the melon into cubes or use a melon baller. Place pieces on a parchment-lined baking sheet and freeze. Then place frozen melon pieces in a freezer container. Just know the texture may change during freezing.

Melons, by themselves are not suitable for canning. In fact, they are a low acid food. There are a couple options to make cantaloupe into pickles or a conserve at www.canr.msu.edu/uploads/resources/pdfs/melons_(e3250).pdf. Watermelon rind can be made into pickles also. See https://nchfp.uga.edu/how/can_06/watermelon_rind.html.


Why is Headspace Important in Canning?

Headspace
Photo: USDA Complete Guide to Home Canning

Headspace is the space in the jar between the inside of the lid and top of the food or its liquid.  The amount of headspace needed depends on the type of food being processed.

If the jars are filled too full the contents may boil out during processing.  Solids or seeds may be caught under the sealing compound and prevent the jar from sealing.

If too much headspace is left at the top of the jar, the processing time may not be long enough to drive out all the extra air from the top of the jar.  This would mean that a tight vacuum seal may not be formed.  Also, the air left inside the jar could cause the food to discolor.

For the correct headspace for each food, check the processing directions for each specific food.

Starchy foods, such as beans or potatoes, tend to swell when heated and therefore require more headspace.

The extent of expansion during processing  it determined by the air content in the food and by the processing temperature.  Air expands more at higher temperatures.

The USDA Complete Guide to Home Canning recommends the following headspace measurements:

  • Jams and Jellies—1/4 inch
  • Fruits and tomatoes to be processed in a boiling water bath—1/2 inch
  • Low acid food to be processed in a pressure canner—1– to 1-1/4 inches

Source: USDA Complete Guide to Home Canning and National Center for Home Food Preservation


Freezing Food for the Fair

Fair judging
Kansas State Fair, Photo: KSRE Flickr

To help save time and stress at county fairs, prepare food entries early and freeze them.  Most baked goods freeze well and can still be blue ribbon quality.  This includes cookies, yeast and quick breads, and cakes.  Here are some tips:

  • Bake the product as usual. Cool completely!  This helps prevent condensation inside the wrapping and development of ice crystals.
  • Use moisture-vapor resistant packaging. This includes freezer-safe plastic containers or bags, heavy-duty aluminum foil, and rigid containers.
  • Separate layers of cookies with wax paper or parchment paper.
  • If a cake or bread is to be frosted, freeze the product only and frost after it is thawed.
  • Make pie crusts ahead of time and freeze. Freezing whole prepared pies can cause the filling to soak into the crust.
  • Thaw all baked goods in the freezer packaging. They can be thawed at room temperature.  Remove from the freezer the night before the fair.  Once thawed, repackage into the proper packaging according to your fair rules.

Source:  Univ. of Georgia, www.uga.edu/nchfp/publications/uga/FreezingPreparedFoods.pdf

Source:  Univ. of Georgia, www.uga.edu/nchfp/publications/uga/FreezingPreparedFoods.pdf


Safely Preserving Tomatoes

Canned tomatoes
Canned tomatoes, University of Georgia

Tomatoes are borderline in pH between acid and low acid foods, so the USDA preparation directions for these products call for acidification to allow a less severe heat treatment than would be required without it. To ensure safe acidity in whole, crushed, or juiced tomatoes, add two tablespoons of bottled lemon juice or ½ teaspoon of citric acid per quart of tomatoes. For pints, use one tablespoon bottled lemon juice or ¼ teaspoon citric acid. Add acid directly to jars before filling. Sugar may be added to offset an acid taste, if desired, but the acid cannot be decreased to taste.

No matter how you choose to can your tomatoes, all steps in preparing and cooking the foods still need to be followed for the process time(s) printed with them. The process times are very different for tomatoes packed in water compared to tomato juice or without added liquid. For many of these tomato products, there are canning options for both boiling water and pressure canning available in our directions.

Source: https://nchfp.uga.edu/tips/summer/canned_tomato_types.html

See KSRE Preserving Tomatoes for more information


Reminder About Elderberries

While elderberries are a fruit, they are actually low acid which can be problematic for canning.

There are some guidelines and instructions to make elderberry jam or jelly safely at www.rrc.k-state.edu/preservation/doc/july-august-presnews2021.pdf.

Do not use low or no-sugar pectin as sugar is critical for safety. Do not replace any sugar with honey.

Freezing is always a safe option for preserving elderberries.

Food Preservation Resources

NCFSEN
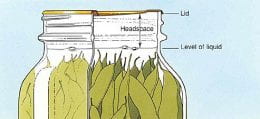
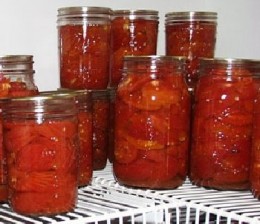
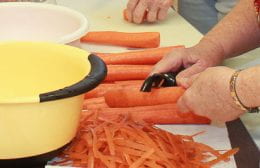
As gardens are getting planted, so are plans to preserve the harvest to enjoy in later months. To safely preserve food, education is key to know the best method and recommendations. The North Central Food Safety Extension Network is working to provide educational resources for a unified message. Here are some resources for your use.

Jar It Right! – Best practices for canning with Mason-type jars. Be sure jars are clean and free of nicks or cracks. Wash jars before use. Warm jars before filling with prepared food. Sterilizing jars is not required for processing times longer than 10 minutes.

Put a Lid On It! – Best practices for ensuring a safe seal on canning jars. Wash lids prior to use, do not heat or boil lids as they may not seal properly. Clean the jar rim before applying the lid to reduce seal failures.

Pressure Can It Right! – Tips to safely use a stovetop or electric pressure canner. Pressure canners must be used for canning plain vegetables or any meat product to destroy Clostridium botulinum spores.

Steam Can It Right! – Guidelines on using a steam canner for preserving high acid foods. This method can be used for any water bath canned food with a total processing time of 45 minutes.

Learn more at www.ncrfsma.org/north-central-food-safety-extension-network-ncfsen.


Peeling Produce Before Preserving

Peeling Carrots
Peeling carrots
Photo: KSRE Douglas county

When preserving food, there are certain steps to take to be sure the food is safe after preserving. One of those steps is peeling produce. Why? Bottom line is food safety.

While the outside peels of many types of produce are nutritionally beneficial, those peels can hold onto microorganisms and dirt. Rinsing produce with water before peeling is the first step to remove microorganisms and dirt. Peeling physically removes that outer layer and drastically reduces contamination. After a final rinse with water, the food is ready to preserve.

Therefore, when a recipe says to peel the produce, it must be done. That recipe was developed and researched with that step included. Choosing to skip the peeling step can result in improperly processed food and spoilage.

Don’t let those peels go to waste! Save them to make a vegetable stock to freeze and use in soups and other recipes. Add them to your garden compost pile or feed your animals.

Source: National Center for Home Food Preservation


Easy Peeling

While a vegetable peeler or paring knife is useful to peel produce, for some foods there is an easier method.

For tomatoes, blanching them in hot water works well and less flesh is lost. Heat a large stockpot of water to boiling. Core tomatoes or poke the skin with a knife and place in the hot water for about 60 seconds or until the peel starts to pull away from the flesh. Remove them from the hot water and plunge them into an ice water bath to stop the cooking process. Gently rub the peel and it should slip off easily.

This method works well for fruits with thin skins such as peaches and nectarines.

Peeling produce is an important step to preserve food safely in  all methods of food preservation.