You Asked It!

Category: November 2019

Let’s Talk Thermometers

Check whole poultry temperature in the innermost part of the thigh and wing and thickets part of the breast.

There are a variety of thermometers to use for cooking. And they are not just for checking meat doneness. They can be use to check temperature of baked goods, stages of candy cooking, and more. They can also help with making good quality food.

There are choices. Here are a few.

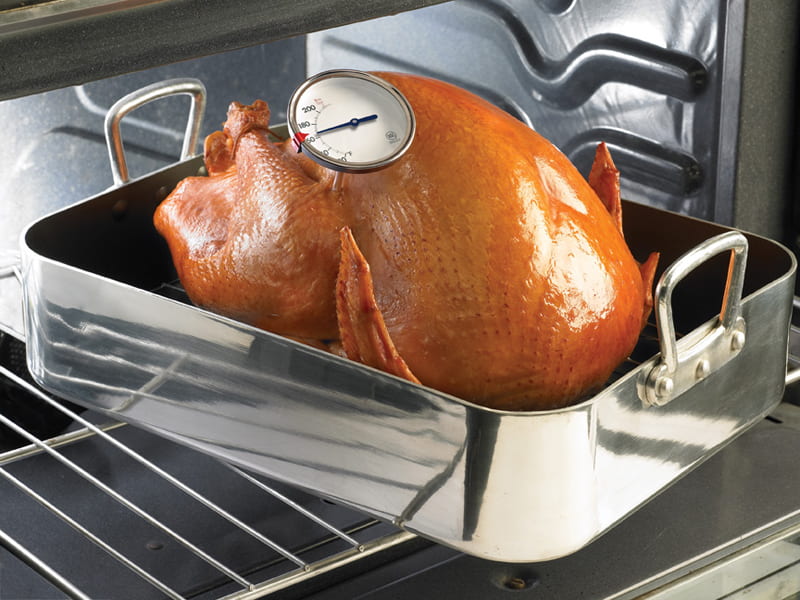
  • Dial Oven-Safe. It can be left in the food while cooking large foods like whole poultry and roasts. Place in the thickest part of the food.
  • Digital Instant-Read. Good for thin foods and gives quick results. Insert at least ½-inch deep into the food. Not oven-safe.
  • Dial Instant-Read. Good for larger foods and soups. Reads in about 15-20 seconds. Place 2-2½” deep into thickest part of the food. Insert sideways into thinner foods. Not oven-safe.
  • Pop-Up. These are in whole turkeys or chickens. They are made of food safe nylon and are reliable within 1-2°F. Always double check doneness with a conventional thermometer in the innermost part of the thigh and thickest part of the breast.
  • Digital Oven Probe with Cord. These can be used in most foods and is oven safe. The base unit sits on the stovetop or counter.

Learn more at https://bit.ly/2ADr7dl.


Can Two Turkeys Be Roasted in One Oven?

The cooking time is determined by the weight of one bird—not the combined weight. Use the weight of the smaller bird to determine cooking time.  Use a food thermometer to check the internal temperature of the smaller bird first and then check the second bird. A whole turkey is safe when cooked to a minimum internal temperature of 165 °F as measured with a food thermometer.  Check the internal temperature in the innermost part of the thigh and wing and the thickest part of the breast.  When cooking two turkeys at the same time make sure there is enough oven space for proper heat circulation.

Source: https://bit.ly/31e2DSE


Arsenic and Rice Safety

Yes, there is arsenic in rice. While that sounds scary, know that it is also found in many other foods.

Arsenic is in the soil, air and water and as crops grow, they absorb arsenic along with other nutrients. That is how it gets into food and it cannot be completely eliminated. Rice is a unique crop in that it grows in water. Arsenic has two chemical forms, organic and inorganic with the latter being of greater concern.

Rice is a food staple in many countries and is a common “first food” for infants. Based on infant body weight, they consume about three times more rice than adults. There are concerns about inorganic arsenic causing potential developmental problems and adverse pregnancy outcomes.

The FDA recommends feeding babies iron-fortified cereal, usually infant rice. They also recommend feeding a variety of infant cereals including oat, barley and multigrain.

Always consult with your healthcare provider for more information.

For more information, see https://bit.ly/33zomFR and https://bit.ly/2EdWoGp.


Food Safety for Holiday Meals

The holiday season is the time to share good times with family and friends. It is not the time to share foodborne illness!

While food safety is important every day of the year, extra emphasis is given during the holidays because of large gatherings and lots of food being served.

Many resources on holiday food safety can be found at www.ksre.k-state.edu/foodsafety/topics/holiday.html. This includes giving food to food pantries and mailing food to family and friends. Quantity cooking resources can be found at www.ksre.k-state.edu/foodsafety/topics/preparation.html.

Remember!

Don’t wash any poultry or meat!

www.usda.gov/media/press-releases/2019/08/20/washing-raw-poultry-our-science-your-choice


Tricks for Flaky Biscuits

Be gentile handling biscuit dough. Too much mixing, kneading, or rolling will make tough biscuits.

For some, making homemade biscuits is scary. But, they are really quite simple. One key component is solid fat and how it is handled. Biscuits need small pieces of cold fat to create flaky layers and tender biscuits. That keeps the flour from absorbing the fat and the flour actually coats the fat. This also reduces gluten development so biscuits won’t be tough.

Whatever solid fat you use, it needs to be cold, or even frozen. Fat that is frozen can be grated into small pieces. Refrigerated sticks of butter or shortening can be sliced with an egg slicer, a knife or two, a pastry cutter, or even a fork. Work quickly so the fat doesn’t warm up too much.

When cutting the biscuit shapes, resist the urge to turn the cutter. This motion causes the dough to twist instead of being straight up and down. Therefore, the biscuits will be lower in volume. Just press down and up!


November is National Raisin Bread Month!

Glazed Raisin Loaf http://nationalfestivalofbreads.com/recipes/glazed-raisin-loaf

Now this is a celebration I can wrap my head around! I consider raisin bread comfort food and have made it often to give as gifts. The aroma of this bread just says comfort!

There are many variations of raisin bread, which typically has cinnamon as an added punch of flavor. Some recipes have raisins in the dough, some have the raisins just in the swirl. The cinnamon can also be used either way. But to truly get that punch of flavor, the spiral with the cinnamon and raisins can hit the spot.

Raisins are little sponges. When baked in bread, they tend to soak up moisture from the dough, making the finished bread dough dry. Soak the raisins in water first to make them plump and juicy, but not mushy.

A cinnamon filling can make a pretty swirl when shaping the loaves. Resist using too much butter as that can cause the swirl to separate and then the bread slices will lose their shape. Add a tablespoon of flour to help prevent this from happening.

However you make this bread, enjoy!


Set the Table to Eat Healthy

In an effort to teach consumers about the new Nutrition Facts label and to help them make healthy food choices, the U.S. Food and Drug Administration has a toolkit to help make nutrition education easier.

The Health Educator’s Nutrition Toolkit includes tips for making healthy food choices when grocery shopping; how to bring nutrition home; how to select healthier foods when eating out; and how to read the Nutrition Facts panel. It also includes evaluation tools and presentation tools that are ready to use.

Learn more at www.fda.gov/food/nutrition-education-resources-materials/health-educators-nutrition-toolkit-setting-table-healthy-eating.

Social media messages and graphics are also available to help encourage consumers to make healthier food choices.


New Yeast for Bakers

If you like the flavor of sourdough bread but don’t want to wait for a sourdough starter to develop, there’s good news!

Red Star® has made a new Instant Sourdough yeast to replace regular yeast in any recipe to give it sourdough flavor. The yeast actually contains a starter culture (Lactobacillus) and rye flour to take the place of a sourdough starter. Simply blend the yeast with the dry ingredients and use liquids at a temperature of 120-130°F. Bread recipes with four cups of flour can use one packet of this yeast.

For more information, including how to request a free sample of this new yeast, go to https://redstaryeast.com/red-star-platinum-instant-sourdough-yeast/.


Baking with Sprouted Wheat Flour

Have you tried baking with sprouted wheat flour? Here are some tips from the Home Baking Association and Chef Stephanie Peterson.

  • Knead longer or add gluten. Sprouted wheat flour is a bit lower in gluten content. Knead dough longer or add extra vital wheat gluten.
  • Use shorter fermentation time. While long fermentation gives more flavor and character, sprouted wheat flour will not raise as much.
  • Cup for cup. Measure sprouted flour as traditional flour.
  • Avoid rancidity. Store in a cool, dry, dark location, or even in the freezer.
  • Food Safety. This is a raw flour just like all other flours. Wash your hands and clean equipment and surfaces well.

Learn more from the Home Baking Association at https://bit.ly/33odEly.


Cleaning and Storing Canners

As canning season winds down, it’s time to clean and store the equipment for next year. Here’s some tips for pressure canners.

  • Clean the vent and safety valve with a pipe cleaner or small piece of cloth.
  • Check the gasket for cracks and food debris.
  • If the inside of canner has darkened, fill it above the darkened line with at mixture of 1 tablespoon cream of tartar to each quart of water. Place the canner on the stove, heat water to a boil, and boil covered until the dark deposits disappear. Sometimes stubborn deposits may require the addition of more cream of tartar. Empty the canner and wash it with hot soapy water, rinse and dry.

For more information, see http://nchfp.uga.edu/tips/fall/store_canning_supplies.html